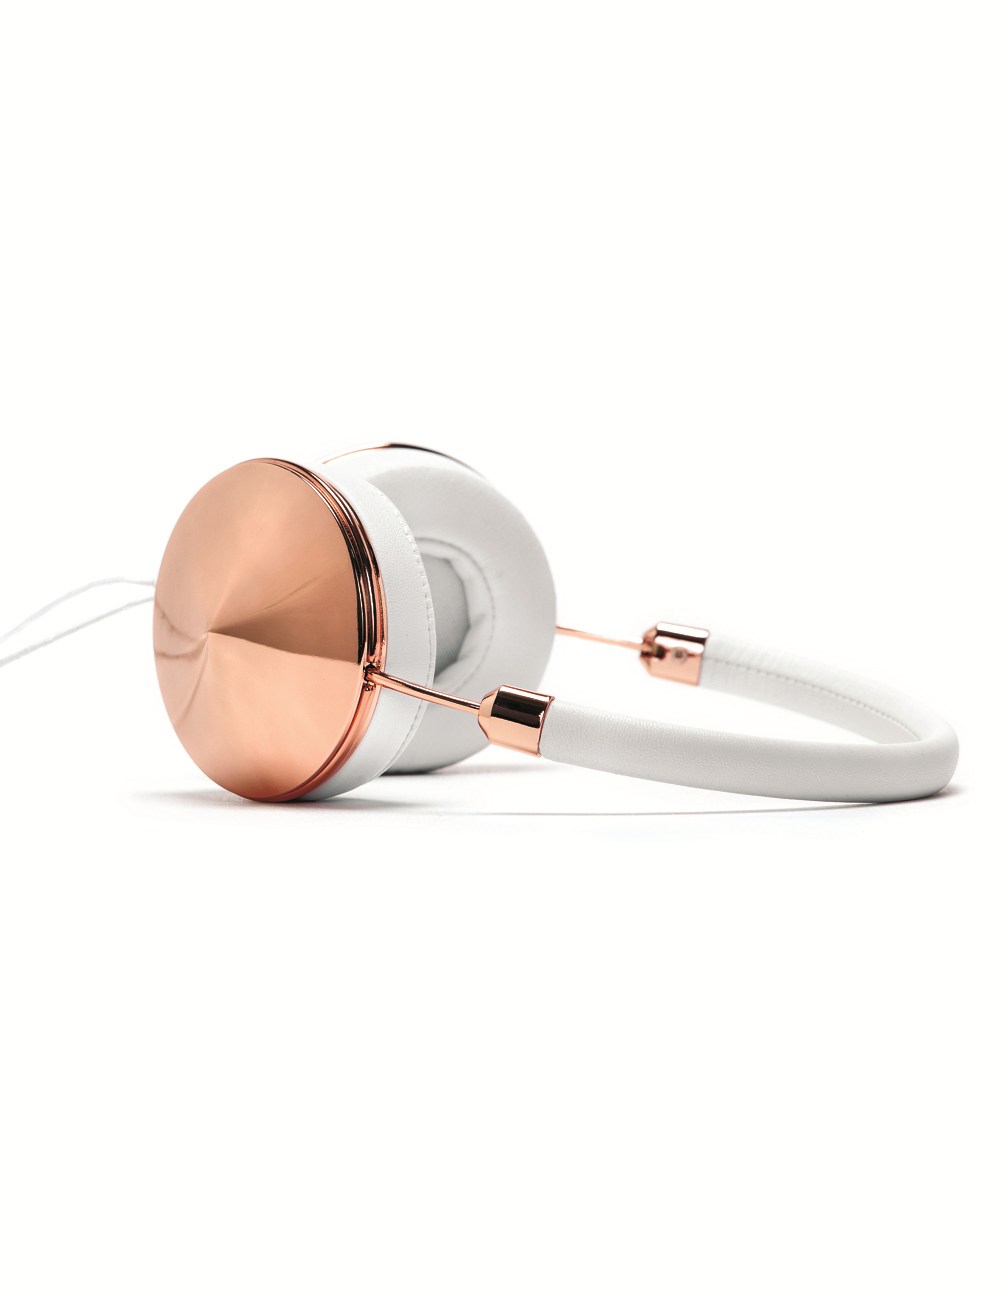
I got the inspiration for new gold/white headphones from the Frend's Taylor Headphones
Now these more "feminine" headphones are designed based on vintage jewelry. Since I had just bought an embossing kit of brass, the ensuing design hit me.

For my design I decided on my initials C.C. the last C inverted so they both would open to my face when I wore the headphones. And since I have recently seen "Written on Skin" by Martin Crimp, an opera featuring medieval illuminated manuscripts, this design followed.
The embossing process (and its reverse, engraving) on this thin metal is quite easy and the whole process took a couple hours. You can of course choose easier designs than this and something like scrolls or floral patterns would also look lovely on headphones (or anything else like a book cover). Or you could forgo the embossing and skip to step 5 and get plain gold headphones like the inspiration photo.

the kit ArtEmboss, as well as some included design ideas.
Tools

tools: metal (brass) sheet, wooden stylus (both from the engraving package), scissors, pen, tape, ruler, sandpaper (optional), scratch awl (optional), hot glue gun (or strong glue), sharpener,
nail polish (optional)
- Before I started I wanted the existing metal on my headphones to be gold, I was thinking painting it with gold paint or nail polish but as I sanded it to prepare the metal for painting I found that the the metal was copper rather than silver and that is what it shall be for the moment.
note: sanding metal should be in a well ventilated area and proper precautions should be taken, after sanding seal the metal (I did it with clear nail polish, or maybe I will use gold later)
also, metal edges especially of thin metal like this are very sharp and can easily cut your hands, use caution especially during the final stages.
The Process
1.Start by placing your metal on a soft surface or mat. Tape down the paper with your design on top leaving room to cut it out later.
note:If you are embossing and your design will be raised keep in mind that the design will be the reverse of what you are tracing.

2. Trace your design with the wooden stylus, sharpen if needed. This will leave a faint imprint on the metal that will be gone over later so this step is not for detail but for placement.

3. Remove the paper and use a pen to go over the faint lines left behind from the stylus. Go over the lines several times to emphasise a line, which I did for the edges of the C's curve.
4. With the metal flipped over detail lines; like eyes, wings, flowers, shading can be put in with a sharp tool (like the awl). These lines would be engraved. This step is totally optional depending on your depth of detail.

5. Cut out the rough shape you will be finishing with, like the circle of the headphones, leaving plenty of room.

You can use tape to get an idea of the final placement. Once that is done the edges can be folded over to get the final markings of the circle. Take care of the metal edges.
6. These circles can be hot glued on (note: the metal heats up very quickly and can be hard to handle, use cloths or gloves). Or alternative glues (like UHU) can be used, but will take longer to set. (remove tape before gluing) I used hot glue for its quick setting time and because I can remove the metal pieces at a later date with a knife if I wanted to change this design for another.
note: the metal covers will be easier to fit if the surface of the headphones (or anything else) is flat, curved surfaces lead to puckered edges.
7. I then put siding on with thin brass strips as my headphones are quite chunky, please leave comments if you want advice on how to do this part.
And voila! Gold headphones with a personalised design! I rather like my finished product. It reminds me of the shields from the Sutton Hoo treasures. The actual design is a line initial from 12th century manuscripts found in Decorative Alphabets and Initials.
 |
| postcard of a detail of St. Felicitas, Sacra Conversatione 1520-1525 Warszawa, Muzeum Narodowe Europa Jagellonica exhibit 2012 |
No comments:
Post a Comment